Get Crafty: Summer Flower Fun

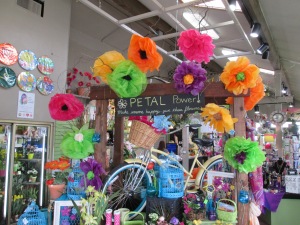
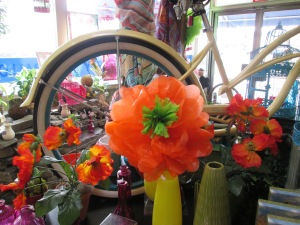
Julianne made a wonderful spring and summer display for our sales floor with tissue paper flowers. They were so easy we thought you might want to try them if you’re looking for a fun, summer project to do for yourself, or with your kids.

40

Here’s the step-by-step how-to:

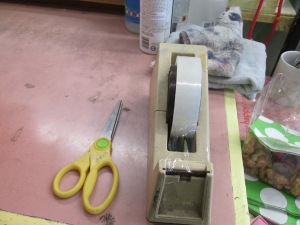
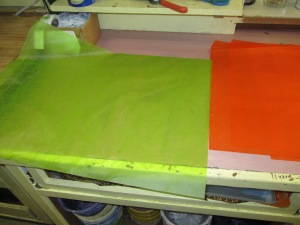
You’ll need scissors; tape; a piece of thin wire; glue (we used hot-glue); and of course, tissue paper in various colors. To do one flower, you’ll only need two sheets of tissue paper in differing colors. The size of our tissue paper is about 23 by 17 inches. You can use paper that’s bigger or smaller, but I put the measurements in here to give you a better idea of what to expect as you go along.

202

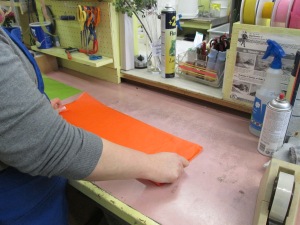
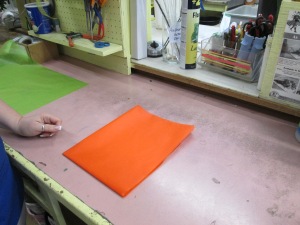
Step 1 – Folding the Paper: Take your first sheet of paper (the one that will be the petals) and fold it in half lengthwise, and then width-wise, as shown in the pictures below. You’ll have an 11 by 9 inch rectangle.

3 5

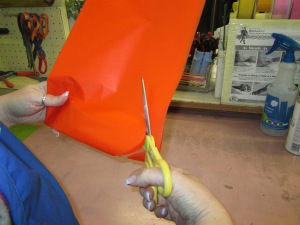
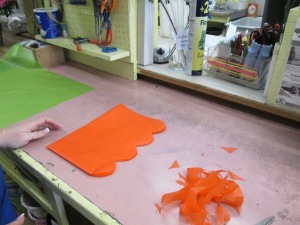
Step 2 – Scalloping the Edge: This is how Julianne formed the round shape of the petals. With your scissors you’ll scallop the edge of the paper you just folded on one side only – the long, loose side (don’t cut on the fold.) This is your creative project, so feel free to change up the shape of the petals in any way you like. You can make them sharper, or more angular.

68

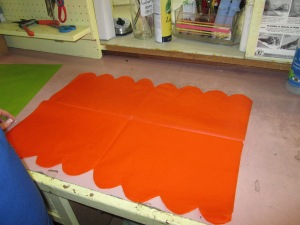
When you open the sheet of paper, it should look like this:

10

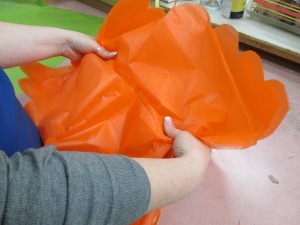
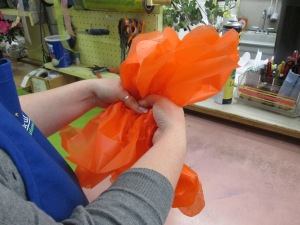
Step 3: Making the Flower: In both hands, grab the paper on each side of the un-scalloped edge, and inching your fingers forward,  gather it towards the center of the paper.

1113

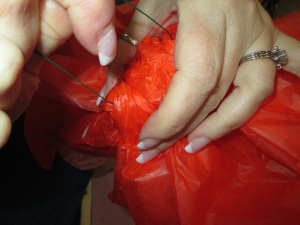
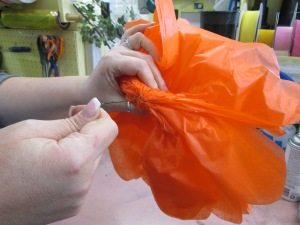
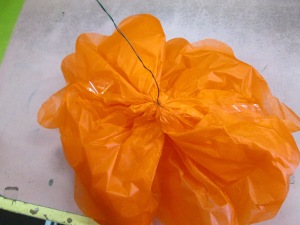
Step 4: Securing the Center: Hold the gathered paper in the center with one hand, and with the other, wrap your wire around the center to secure the gathering effect. Then fold the gathered edges towards each other to form the head of a flower.

1416

Step 5- Securing the petals: To secure the edges and form a continuous flower head, tape the paper where the folded edges meet. Tape beneath the flower so you don’t see the tape from the top.

22

Your flowers, so far, should look like this:

19

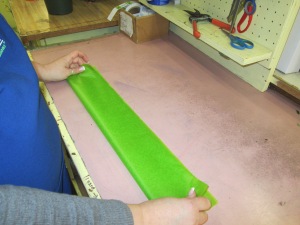
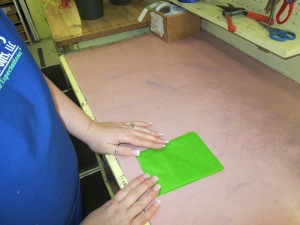
Step 6- The Center: To do the center of your flowers, grab your next sheet of paper. Fold it length-wise twice (until it is about 4  inches in width.) Then, fold it down the middle width-wise – twice. You’ll have a rectangle about 5 by 6 inches.

2426

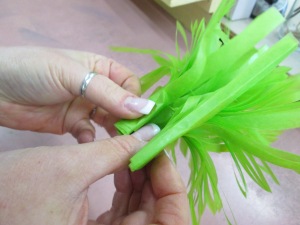
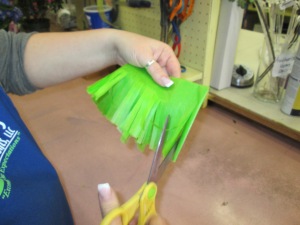
Step 7 – Forming the Center: On the side of your rectangle that is NOT all folded, cut strips down the length of your rectangle, stopping a couple of inches from the bottom. (Don’t worry if you cut the side with the folds. The effect will be a little different, but that’s okay. No flower is exactly alike.)
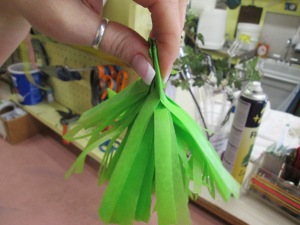
29Step 8 – The Center Strips: Grabbing the uncut side of the rectangle, fold it twice so that the strips gather together.

3132

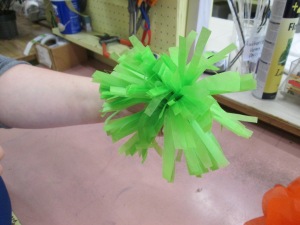
It should look like this:

33

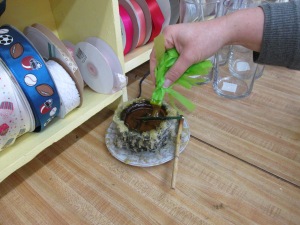
Step 9 – Putting it all Together: – Glue bottom of center and stick it into the middle of your flower.

3435

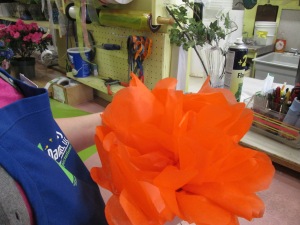
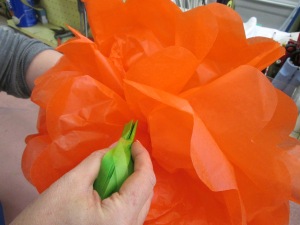
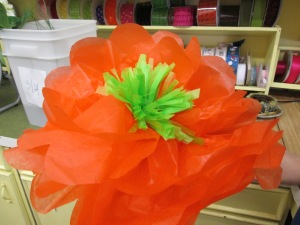
The final Step: Fluff out the petals and the center.
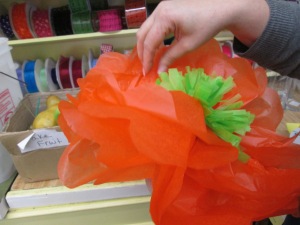
36And here is the finished product:

3738

Have fun!


Fun, Quick DIYCenterpiece Idea

This Easter afforded us a perfect DIY centerpiece scenario: what do you do when you need something for your table, but you’re in a hurry and are low on flower options? Dandelions owner Shirley Lyons found herself in this situation this weekend, and was kind enough to share how she resolved her problem.

You’d think that as florists, we are constantly taking  flowers home to make fabulous and lush centerpieces and arrangements for family functions. That does happen on occasion, but usually, and  more often than we’d like to admit,  even the florist forgets to take flowers home!! Shirley was half-way home before she realized she did exactly that! So between babysitting her two-year and twelve week old grand-kids (a juggling act of princess dolls and diapers), and preparing dinner for twelve, she needed to come up with something fast and uncomplicated. Thankfully, Shirley had daffodils growing in her yard, and with some of these and a few vases in colorful, spring tones and varying heights, she had a quick, fun, artsy centerpiece on her dining-room table!

centerpiece 5Daffodils centerpiececenterpiece 1

Using what you have growing in your yard (be it flowers or some pretty greenery)  and your collection of vases is a cost-effective way to make a great impression, and get your creative juices flowing!

We love flowers because they’re inherently beautiful and really don’t need much embellishment to make a statement. Artfully placed vases and simply arranged flowers are an easy way to enhance any event.IMG_0200

Aqua vases with yellow flowers

How to save $ on wedding centerpieces

reception_hi-16  You want your wedding to be spectacular and leave an impression on your guests. Reception centerpieces can often be a large part of your floral budget and there are a few ways to save money and yet creative a beautiful atmosphere.

Your florist has the experience and know-how to design with flowers. An easy way to save is to entrust the floral design to a professional florist but save by purchasing your own containers. One of my brides this summer wants to used galvanized tin milk pails. She has purchased them on her own and I will be creating the floral centerpieces. Just make sure that when you are looking for your containers that they are water-tight or contain a liner. This strategy is best if you want a combination of flowers or a design that is more complicated.

If you are determined to go the DIY centerpiece route here are my tips…

Choose a simple design. Hydrangeas can be used in a variety of ways and are easy to work with. A single blossom submerged in water or a cluster are simple enough to do yourself but have high impact. Your vases can be purchased in bulk from your florist as well as the flowers. Although there are websites that you can purchase bulk flowers from, the flower-specific care and handling can mean the difference between flowers that look gorgeous on your wedding day and flowers that don’t hold up. Buy your flowers in bulk from your florist so that they can by processed by a professional and stored in a temperature-controlled cooler.

Photo used by permission from Syndicate Sales

Milkglass wedding centerpiecesAnother design that is popular and easy are single stems of flowers in budvases. A collection of budvases at each table with flowers in them are ideal for a more casual event or a wedding with a vintage feel.

Photo used by permission from Syndicate Sales

Photo used by permission from Syndicate Sales

Discuss your ideas with your florist and allow them to guide you with the plan that will best achieve your look. As florists we know which ideas are feasible for DIY and which could turn into disaster. We want your wedding to be beautiful and sometimes the little bit of extra money you will save doing it yourself just isn’t worth the headache. But if you do…good luck and happy designing!

First Design Class was a blast!

We held our first design class here at Dandelions last Wednesday and our instructors and attendees had so much fun! Everyone wanted to know when the next class was going to be so we are working on putting another one together hopefully before Christmas.

There were a few mother-daughter teams and everyone left with their own wreath to decorate their home. Some of the girls got their Martha Stewart mojo on and added extra touches to personalize their wreath even more. The class was such a hit and we can’t wait to host another one soon!

The addition of spiders and cobwebs made this wreath creepy for Halloween

Two of the students with their finished wreaths

This mother-daughter team built theirs together

Their was also a demo on how to make a quick and easy napkin ring for your Thanksgiving table

Fall Wreath Design Class

DIY fall wreath
Fall Wreath Design Class

Wednesday, October 5, 2011 (7:00pm-9:00pm)

2 Hour Class is $45.00

Instructor: Julianne

Class Size Limit=8

Ages: 12 and older

Join us at Dandelions Flowers for a fun new design class! This class focuses on designing your own grapevine wreath to adorn your home just in time for the autumn season.

All design classes take place at Dandelions Flowers & Gifts’ retail location at

1710 Chambers Street in Eugene, OR.

Register for the class by emailing dandemanager@aol.com or by calling 541.485.1261.

Class includes supplies & materials, refreshments and 1-on-1 instruction. We encourage you, however, to bring special items from home if you wish to include them in your wreath!

Dandelions Flowers will be open so those attending workshops will be able to shop and purchase  supplies, gifts and flowers during and after the workshop.

CANCELLATION POLICY

Cancellation by you: A full refund is made if the cancellation is more than 5 days prior to the commencement of the workshop. No refunds will be made if the cancellation is made less than 5 days before the commencement of the workshop.

Cancellation by us: Cancellation of a workshop would be a very rare decision. However, in any event, we reserve the right to cancel a class for any reason. We will refund your workshop fee in full should a workshop be cancelled. It is an explicit term of our booking conditions that you will not hold us to account for any incidental expenses that you may incur due to the cancellation of a workshop.